My day by day as an open source enthusiast
How to create Laravel packages simple and fast

Software engineer, part-time writer
From an idea comes its development, that's why, after several package ideas, I came to the conclusion of creating this organisation on Github, but also creating its base template for what I do most: Create PHP packages extending Laravel.
Now here's the template repository I use for every package I create.
So you can use it directly or make your own based on this (simply go and fork it).
But on this guide I'll explain why I'm using the template and what I'm using on this.
Important note
Before going further, you should know that creating a package is like planting a tree, is something you should properly take care of.
For the good of the community, you're the one that should take the decision, otherwise you could also search if there is any package that does the similar thing as yours, if not exactly maybe contribute to this one sending it a Pull Request.
Template features
These are the features so far the template gives me:
- Everything comes pre-configured to a very basic
- Simplicity & preventing errors when adapting it to my specific package to be published, because it have all the keys and replacements table on its README.
- It have coverage and code quality by Codacy which runs several PHP suites like PHP Mess detector and PHP CodeSniffer every time you commit something to the default branch.
- It comes with some extra stuff for the Github Actions (CI), like PHPUnit tests with code coverage being uploaded to Codacy, Larastan for PHPStan (static analysis) and Laravel Pint for code formatting.
- And... badges for the win! Thanks to shields.io.
Getting started
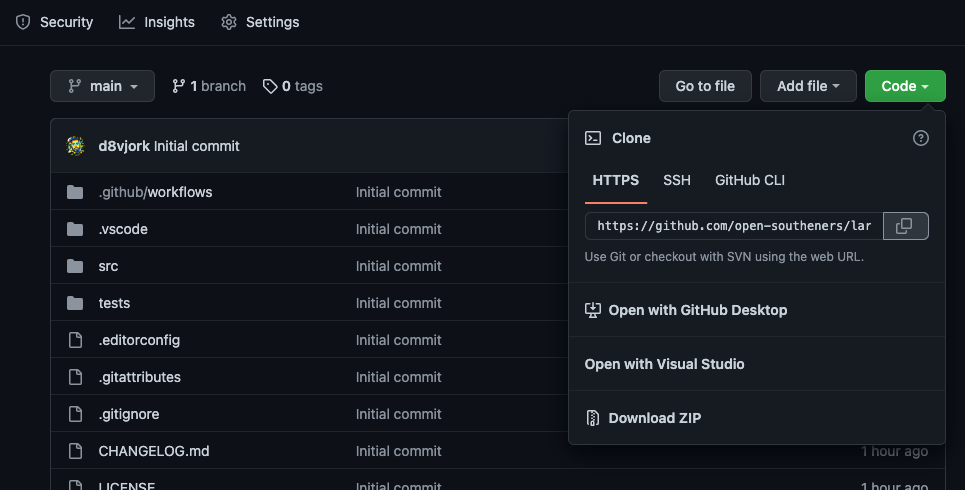
First of all fork my template onto your Github profile or organisation, then click on create project (the plus icon on Github's header navigation bar).
Select the template repository you just forked and name your project, then clone locally with git, and ready for the battle!
Open the README.md that you should have on the root folder with your preferred IDE and start replacing everything that comes below the Search & replace like so (if you're using VSCode):
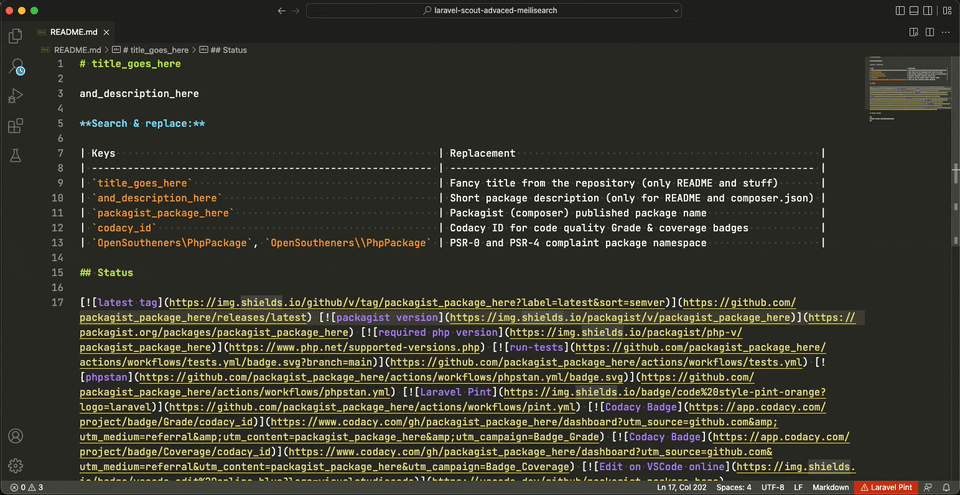
Replace everything then remove the table from your README file.
Note: Is also important that you replace the authors part in the composer.json file just so you don't publish packages under my name 😅
Publishing to Packagist
Final step is to get your package published so everyone can just go ahead and grab it by using Composer.
For this reason we'll need to go to Packagist and create an account (if you don't have one).
When done, just submit them the repository link of what you just created going here, repository's link can be found here:
Then when you submit the package it will start listening to Github's events, specially the one when you push a tag or create a release to the repository, so you can do by going to the releases page then creating one like so:
Frequent problems
I published a package but it never get updated on Packagist
Most of the cases can be a problem that you forgot something on its link when you submitted the package to the platform, just to double check, go to the package page on Packagist and then click on the "Edit" button (if you don't see it make sure you login into your account).
Another reason can be that you forgot to publish a new release in your repository so that it creates a new tag.
Packagist is not showing me as the package author
Make sure that your authors part of the composer.json is updated with the names and emails of yourself and your partners.
Once you done everything is time to...
Happy coding!
